You can print on legal paper by following these steps.
LOADING LEGAL PAPER INTO YOUR BROTHER MACHINE
To print on to legal paper, you must load legal size paper into your Brother machine by following these instructions:
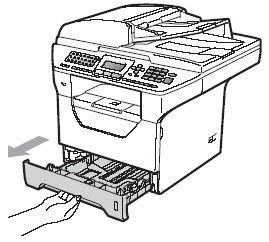
1. Pull the paper tray completely out of the machine.
2. Remove any paper inside the tray.
3. While pressing the blue paper-guide release lever (1), slide the paper guides to fit legal-size paper.
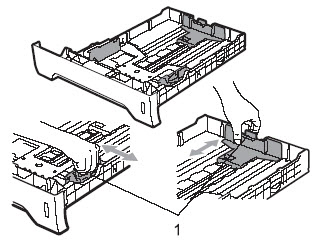
- Make sure the paper guides are firmly in the slots.
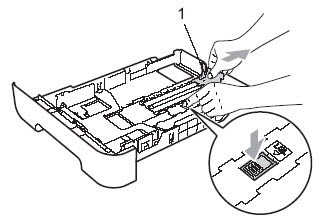
4. Press the release button (1) in the bottom of the paper tray and pull out the back of the paper tray.
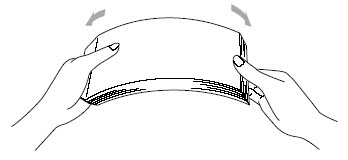
5. Fan the stack of legal size paper well to avoid paper jams or misfeeds.
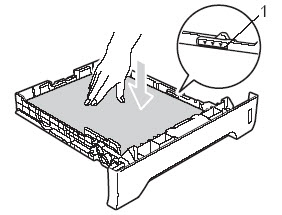
6. Place the paper in the paper tray.
- The side to be printed on must be face down.
- The tray can hold up to 250 pages of 20 lb. plain paper.
7. Check that the paper is flat in the tray and below the maximum paper mark (1).
8. Put the paper tray firmly back in the Brother machine.
- Make sure that the tray is completely inserted into the machine.
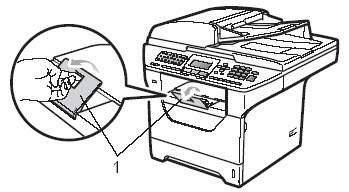
9. Unfold the support flap (1) to prevent paper from sliding off the output tray.
CHANGING THE PAPER SIZE SETTING
After loading the legal size paper into your Brother machine, you must change the Paper Size to legal.
1. Do one of the following:
- To set the paper size for the MP Tray (Manual Feed Tray), press MENU, 1 (General Setup), 2 (Paper), 2 (Paper Size), 1 (MP Tray).
- To set the paper size for Tray #1, press MENU, 1 (General Setup), 2 (Paper), 2 (Paper Size), 2 (Tray #1).
- To set the paper size for Tray #2, press MENU, 1 (General Setup), 2 (Paper), 2 (Paper Size), 3 (Tray #2).
NOTE: Tray #2 or T2 only appears as a menu option if you installed the optional tray.
2. Press the UP OR DOWN ARROW key to select Legal.
3. Press the OK key.
4. Press the STOP/EXIT key.